|
Making an IIS virtual directory for findinsite-ms
If you are running Internet Information Services (IIS) on your computer or have full access
to your main server, then you can set up an IIS virtual directory. A virtual directory
does not exist in the normal web site folder (eg \inetpub\wwwroot\. Instead,
a virtual directory is an alias that refers to a real directory in another location (on the
same computer).
Having installed findinsite-ms, you can make a virtual directory for
one of two locations:
- The findinsite-ms documentation:
eg
C:\Program Files\PHD\fisMS\
- The findinsite-ms runtime:
eg
C:\Program Files\PHD\fisMS\runtime\
To test findinsite-ms, including the Search API examples, make a virtual directory
for the findinsite-ms documentation. For a production environment,
make a virtual directory for the findinsite-ms runtime.
Steps to make a virtual directory
- Start the IIS Manager, eg "Start+All Programs+Administrative Tools+Internet Information Services".
In IIS7, to run IIS Manager, create a shortcut on your desktop that runs C:\Windows\System32\inetsrv\InetMgr.exe or equivalent.
- Expand the folders on the left.
- Right-click on the "Default Web Site" or equivalent.
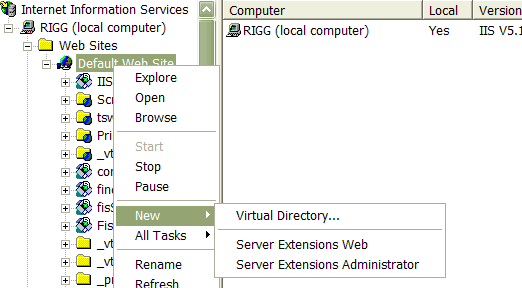
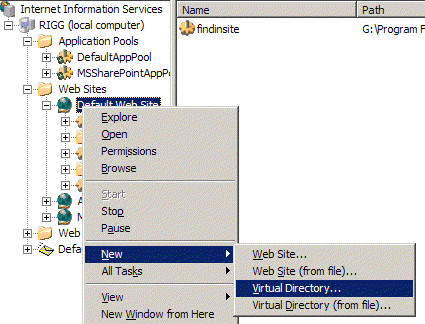
- Select "New+Virtual Directory..."
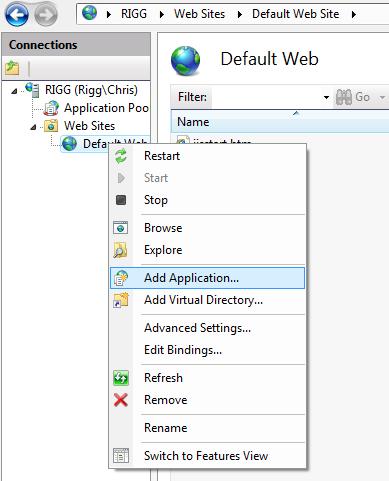
In IIS7, select "Add Application..."
In IIS 5, it looks like this:
In IIS 6, it looks like this:
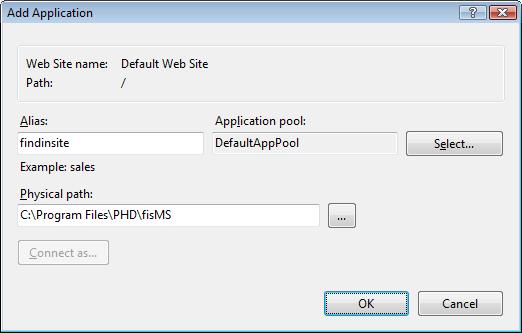
In IIS 7, right click on a web site and click on Add Application:
- For IIS5 and IIS6:
- In the Virtual Directory Creation Wizard, click Next.

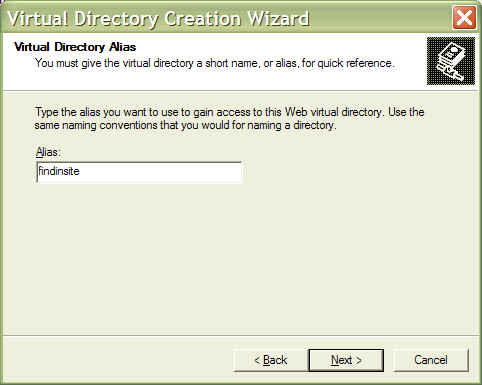
- Enter an alias for FindinSite-MS (eg
findinsite) and click Next.
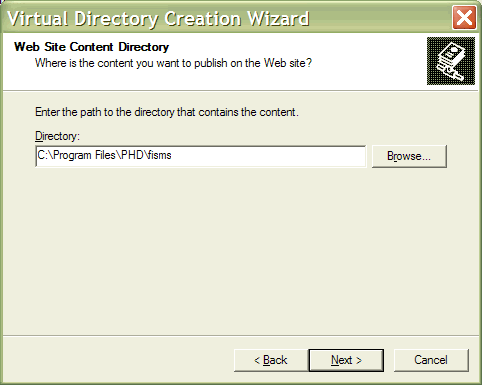
- Select a source directory, eg the FindinSite-MS installation directory
C:\Program Files\PHD\fisMS\,
and click Next.
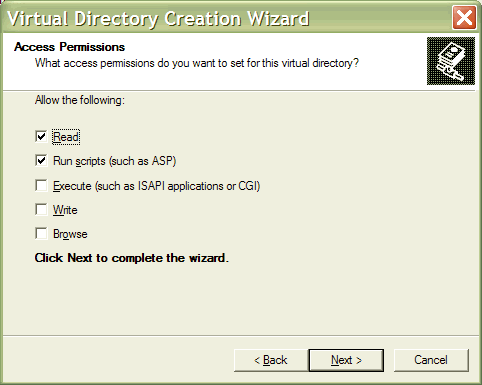
- Select 'Read' and 'Run scripts' permissions, and click Next.
- Once complete, click Next.

- For IIS7, enter the new application name, eg
findinsite
and the physical path, eg C:\Program Files\PHD\fisMS\.
Now return to the installation instructions.

|


