|
Work directory file write permissions
findinsite-ms uses a 'work' directory to store its configuration and search databases.
By default, findinsite-ms (tries to) create a work sub-directory called FindData, ie
/findinsite/FindData/. However this will only work if the findinsite-ms application
has file write permission for its directory (and sub-directories) on the server.
If you want to use a different location for the 'work' directory, then use the Control Panel
General section "Test work directory" box to check that this directory is suitable.
As described below, you will need to ensure that "ASPNET" or "Network Service"
accounts can read, write and delete files in this directory. If your directory works OK, then you need to edit the
supplied Web.Config file as described here,
eg /findinsite/Web.Config. Towards the end, add in a "work"
<appSettings> value, eg:
<add key="work" value="c:\FindData" />
Once you have set up your system so that the findinsite-ms application
can access its work directory fully, you may also want to configure
IIS so that the work directory is not accessible to direct browser requests -
see below for details.
Setting write permissions
The findinsite-ms application must have write access to the work directory.
If you are using a FAT32 format drive then all users have full control over files, so no changes are required.
However, most servers use the NTFS file system and therefore file permissions must be set correctly
for findinsite-ms to work.
(On a trial desktop Windows Vista IIS7 system it was not necessary to change file permissions on an NTFS drive.)
If you have Administrator access to the computer holding your web site, then you can use Windows Explorer
to set the appropriate file permissions, as described below.
If your web site is on a shared host, then you will not be able to use Windows Explorer.
It could be that the permissions are correct by default. Some web site hosters provide
a user interface that lets you change file permissions. Otherwise, you will have to contact
your web site host administrators and ask them to look at this page and set the file permissions
for the findinsite-ms application directory.
Setting NTFS file write permissions using Windows Explorer
The aim of the following steps is to let the findinsite-ms application
have read and write access to its application directory and all its files and sub-directories -
only read access is provided by default.
To achieve this, the "ASPNET" and "Network Service" user accounts must have file write permission.
You need to be an Administrator user to change file permissions.
- Start Windows Explorer (not the IIS Manager) and find the findinsite-ms
directory that you are using. If you are using a virtual directory, then you will typically use the
findinsite-ms installation directory, eg:
C:\Program Files\PHD\fisMS\
If you have copied findinsite-ms to your server web folder, then you will typically
be using a directory like this:
\inetpub\wwwroot\findinsite\
- Go up a directory level and right-click on
findinsite and click on Properties.
Select the Security tab - which should look like this in Windows Server 2003:
- You now need to add a new set of permissions for "ASPNET" for IIS5 or "Network Service" for later IIS versions.
Click on Add... in the Security tab and enter
ASPNET or Network Service in the following box,
then press OK.
Then press Add... again to add IIS_WPG.
- Still in the Security tab, select "ASPNET" or "Network Service" and check the "Write" permission box in the
"Allow" column:
Disable browser Read access to your work directory
Once you have set up your system so that the findinsite-ms application
can access its work directory fully (as described above), you may also want to configure
IIS so that the work directory is not accessible to direct browser requests - a direct browser request
could reveal your configuration details such as license id and password.
If it is not possible to stop these requests, then you can store your password and license id
in the Web.Config file - as described here.
- Local computer using IIS5 and IIS6
- If you have Administrator access to your server:
- Start the Internet Information Services (IIS) Manager using "Start...Administrative Tools".
- Navigate to the work directory, eg
.../Default Web Site/findinsite/FindData.
- Right-click and select Properties
- In the "Directory" tab uncheck the "Read" box -
screenshot of work directory with Read permission removed -
and click "OK".
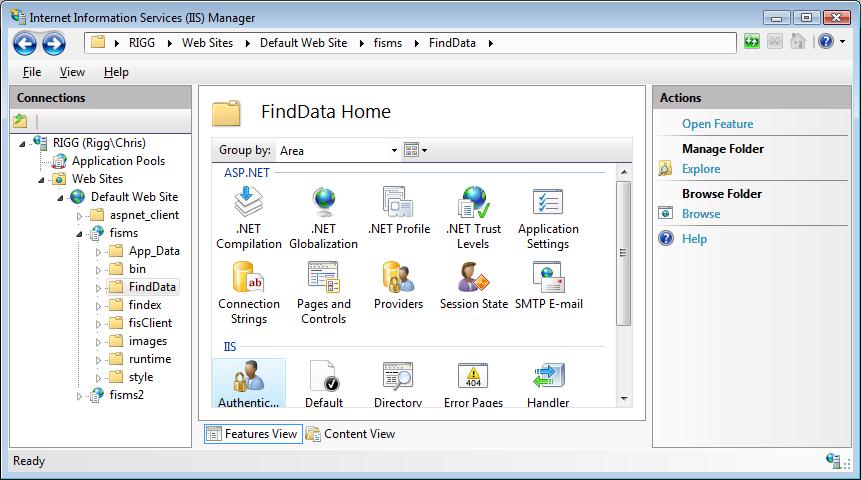
- Local computer using IIS7
- If you have Administrator access to your server:
- Run IIS Manager (create a shortcut on your desktop that runs
C:\Windows\System32\inetsrv\InetMgr.exe or equivalent).
- Navigate to and click on the work directory, eg
.../Default Web Site/findinsite/FindData.
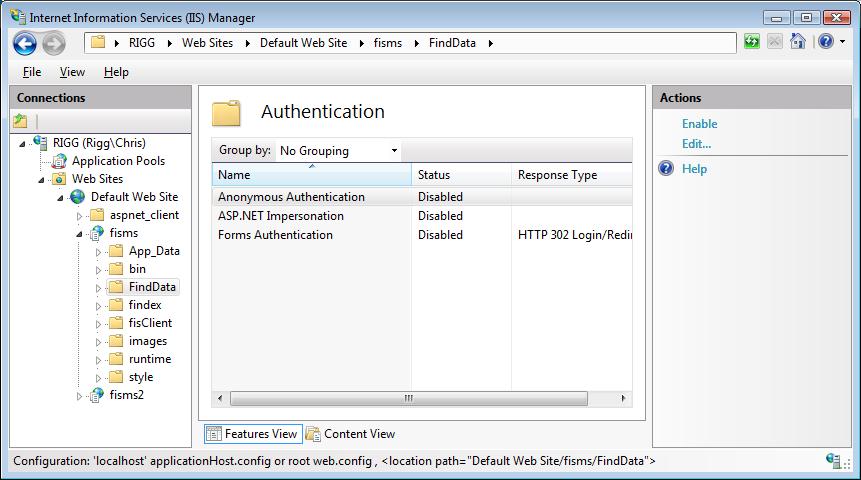
- In "Features View" select "Authentication" -
screenshot of IIS 7 Manager Authentication Features View for the work directory
- Disable "Anonymous Authentication" -
screenshot of work directory with Anonymous Authentication disabled
- Shared site
- Your shared site host may provide a user interface to disable IIS Read permission for the work
directory. Otherwise you will have to ask your site administrators to do this job for you.
|

